EC2 With Linux

Hey, I am Nidhish Malav i am a aspiring cloud enthusiast who is eager to embark on a journey into the world of cloud computing. With a strong passion for technology and a keen interest in cloud-based solutions, I am driven to learn and contribute to the ever-evolving field of cloud computing. As a student of Computer Science, I acquired a solid foundation in fundamental programming concepts, networking, and system administration.
AWS

Amazon Web Services (AWS) is the world’s most comprehensive and broadly adopted cloud, offering over 200 fully featured services from data centers globally. Millions of customers—including the fastest-growing startups, largest enterprises, and leading government agencies—are using AWS to lower costs, become more agile, and innovate faster.
EC2
Amazon Elastic Compute Cloud (Amazon EC2) offers the broadest and deepest compute platform, with over 600 instances and a choice of the latest processor, storage, networking, operating system, and purchase model to help you best match the needs of your workload. We are the first major cloud provider that supports Intel, AMD, and Arm processors, the only cloud with on-demand EC2 Mac instances, and the only cloud with 400 Gbps Ethernet networking. We offer the best price-performance for machine learning training, as well as the lowest cost per inference instances in the cloud. More SAP, high-performance computing (HPC), ML, and Windows workloads running on AWS than any other cloud.
Creating an EC2
Create an AWS account if you don't have it.
Do log in to your AWS account.
Search for the EC2 tool.
Inside the tool, you will find an option to launch a new instance.

Inside the EC2 you have to give a name to your Instance(virtual machine) and select the AMI (Amazon Machine Image) it defines which type of Operating System you want in your Instance.
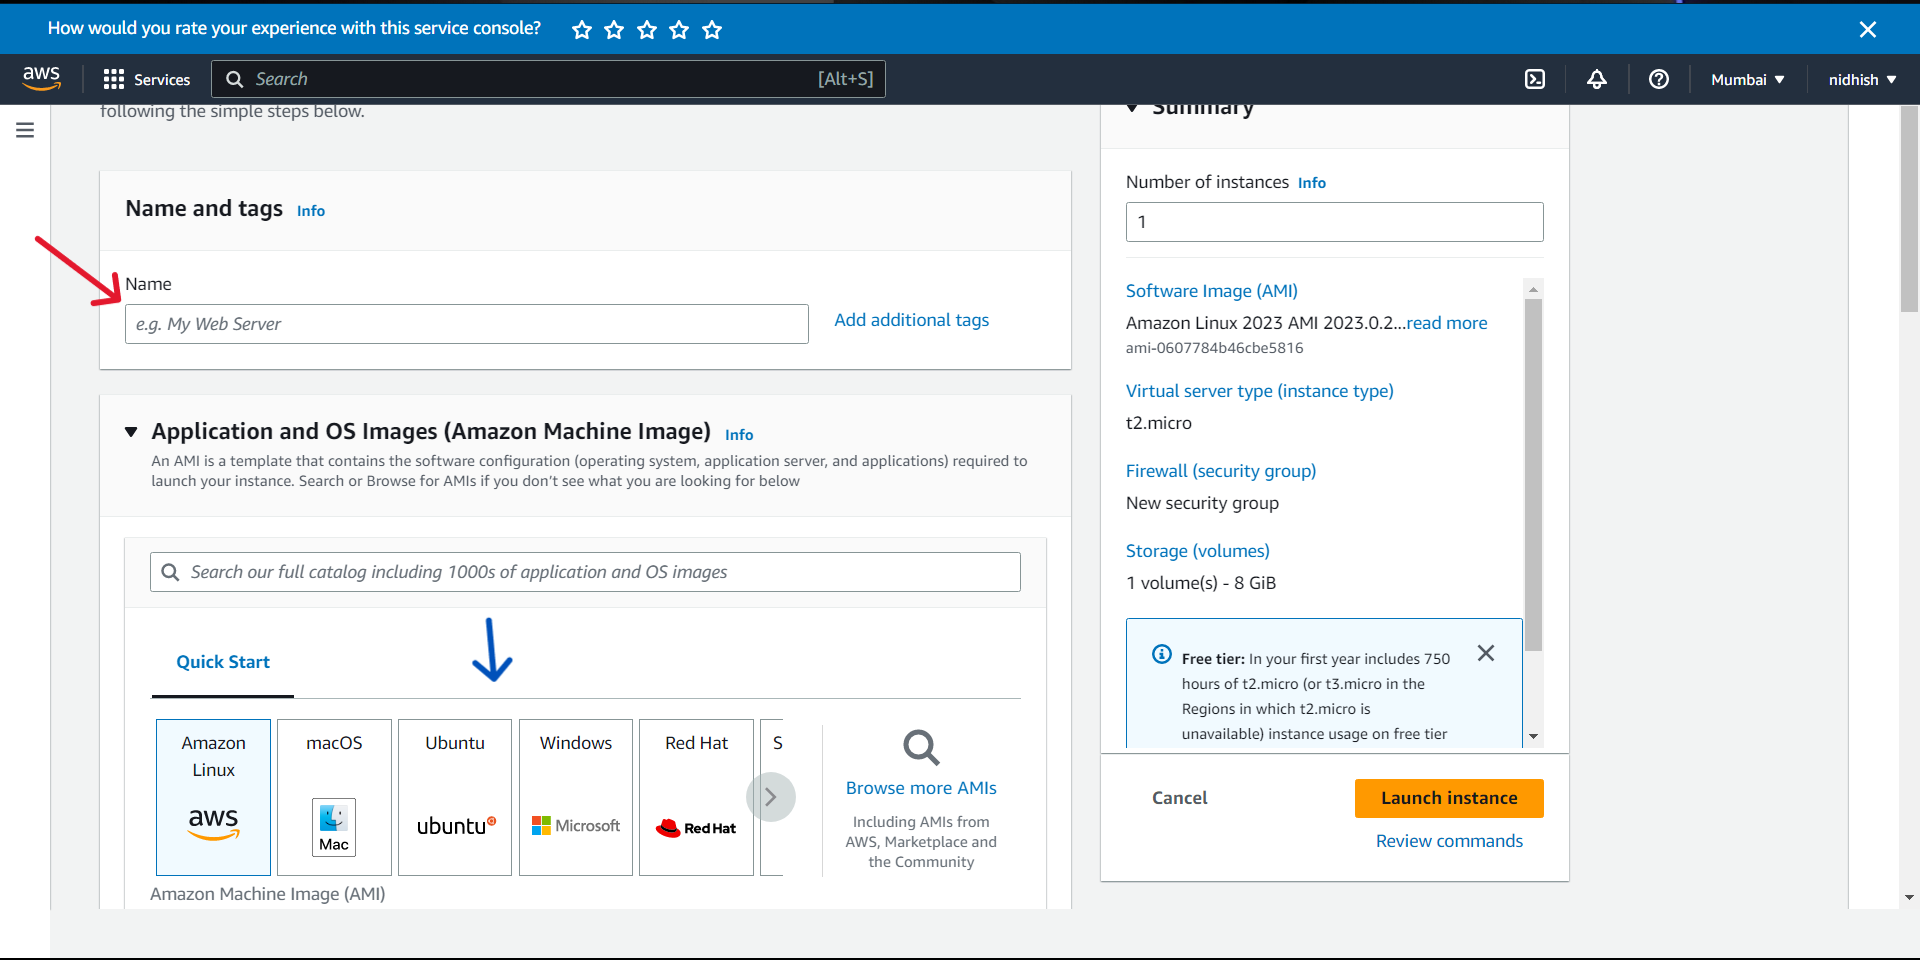
Then select the version of your image you want to use.
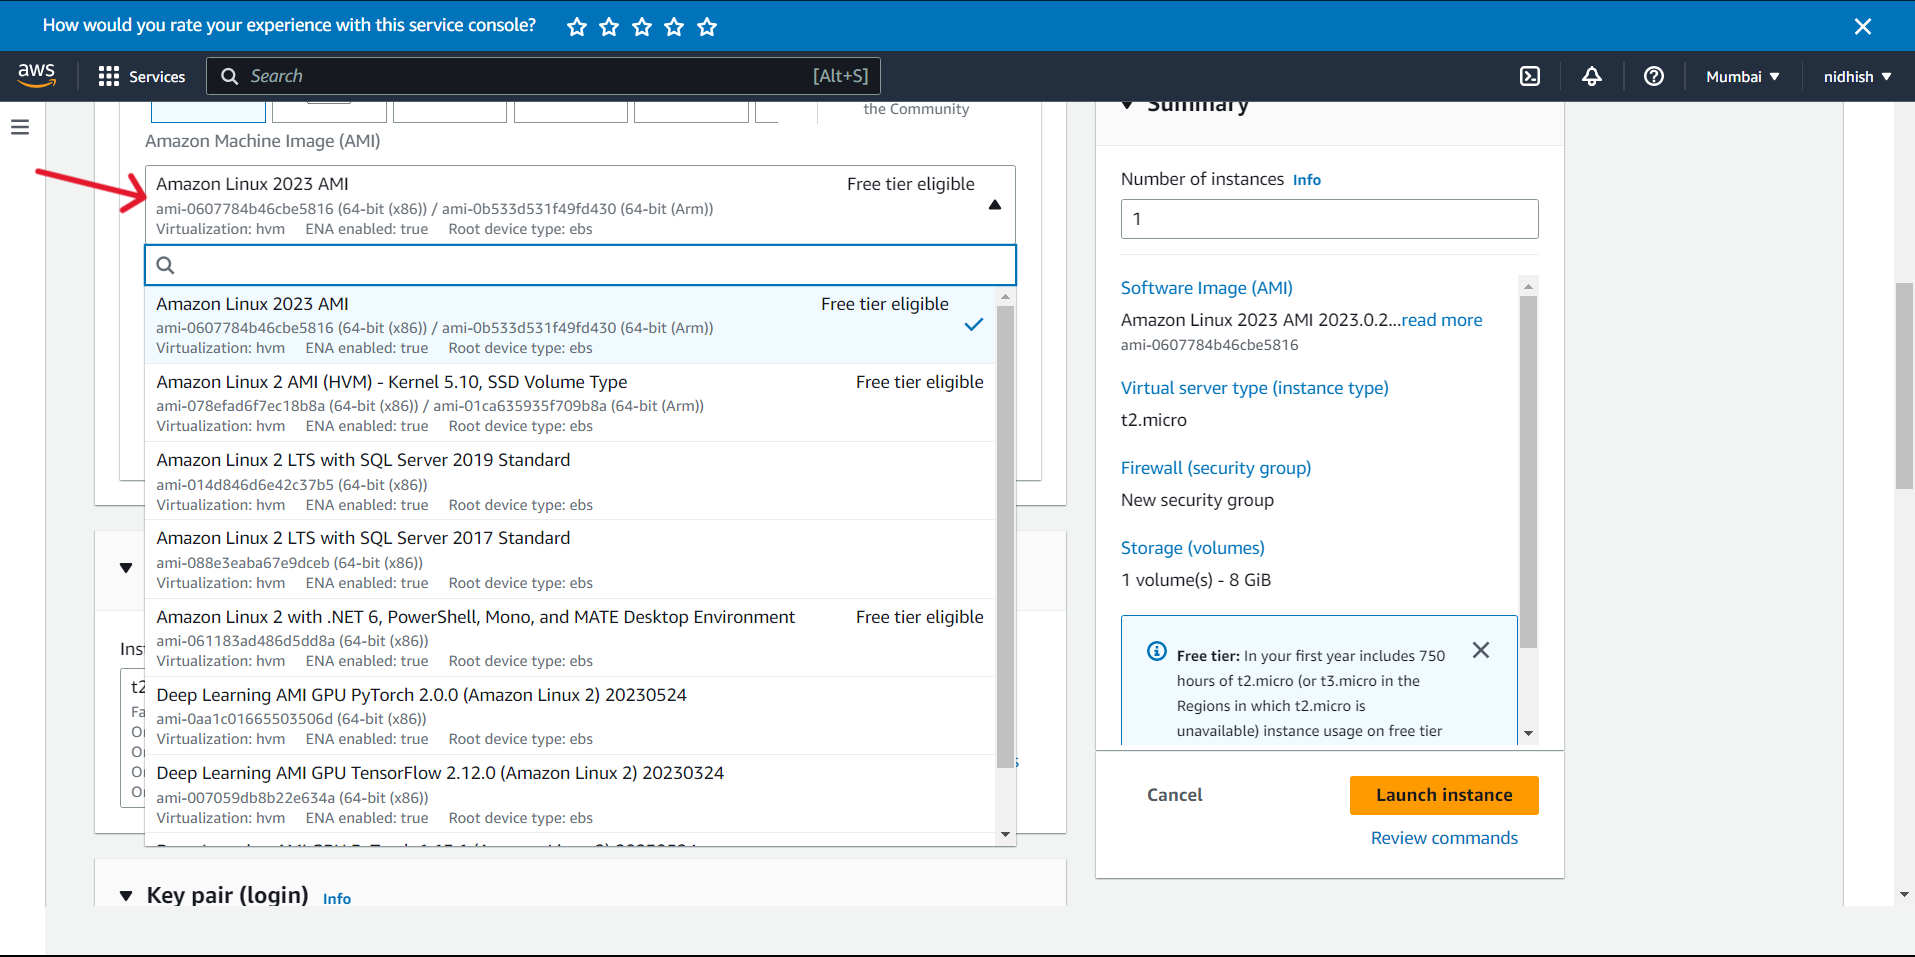
Then select the type of Instance you want. It defines the number of CPUs and Memory of your Instance.
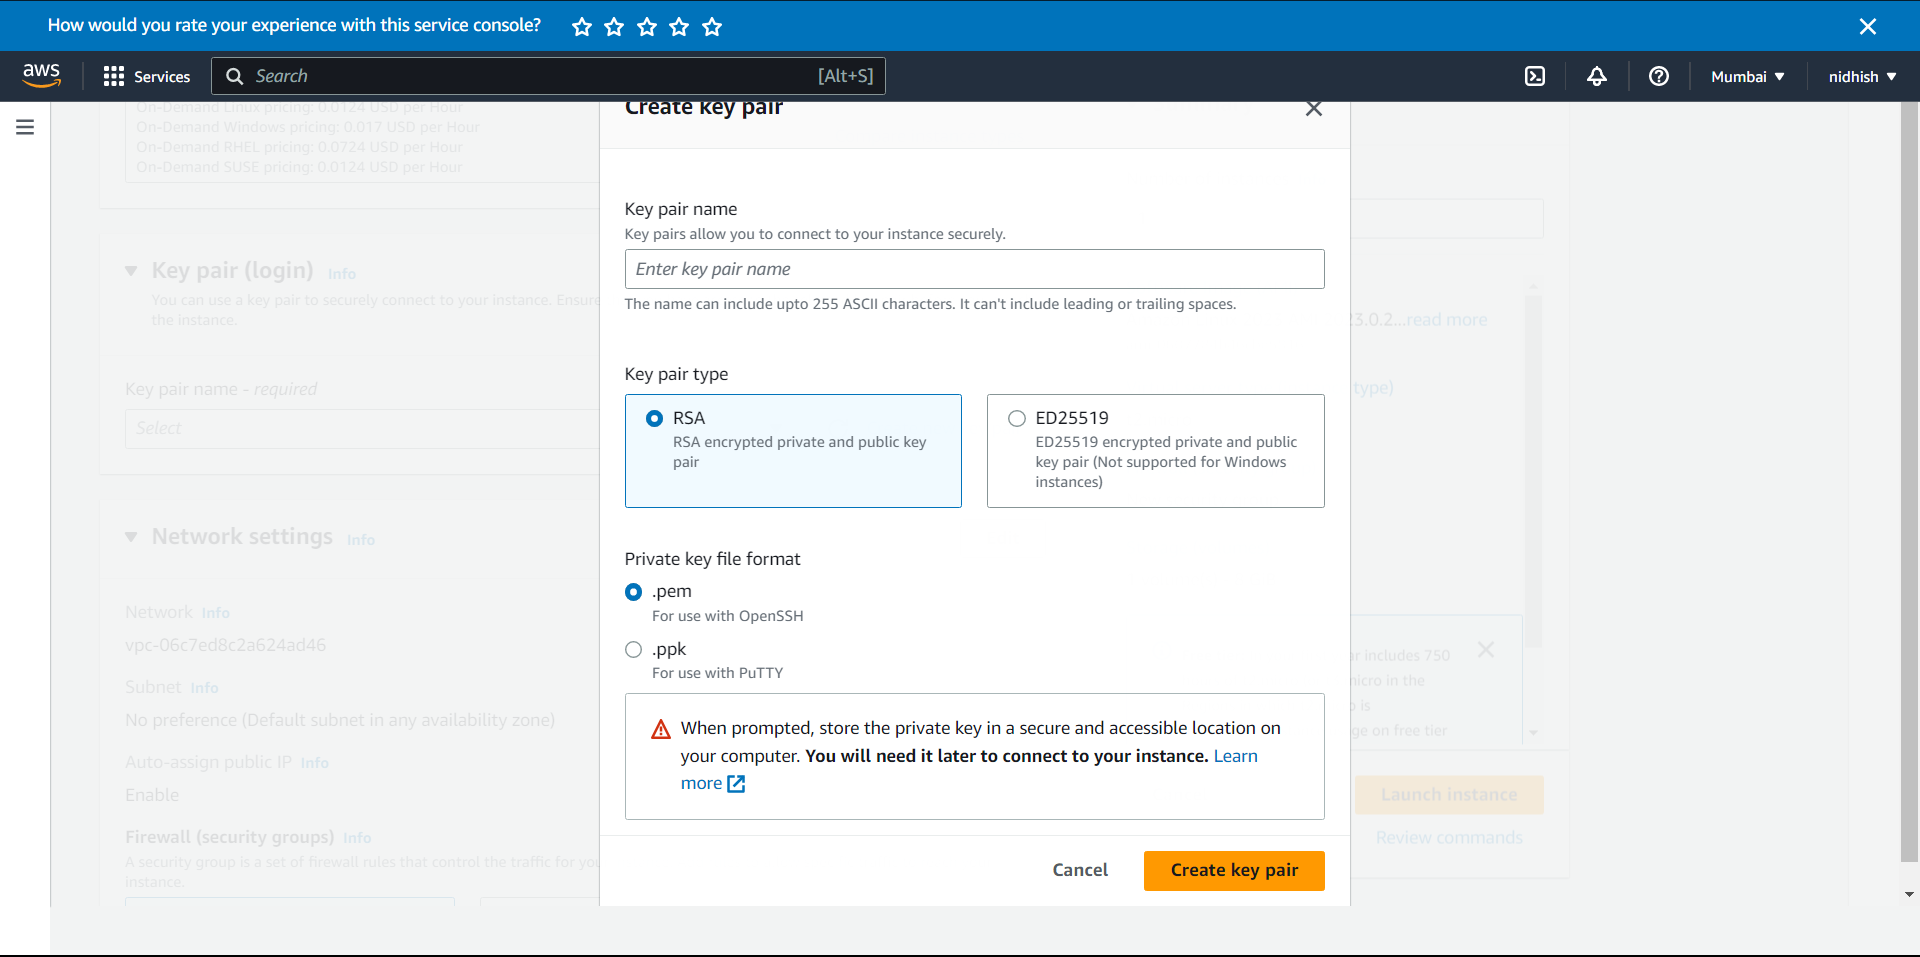
Then create a Key Pair for your Instance with the help of the key you are able to access the instance using your CLI with the help of Linux Commands after creating the Key Pair file will be downloaded to your local machine.
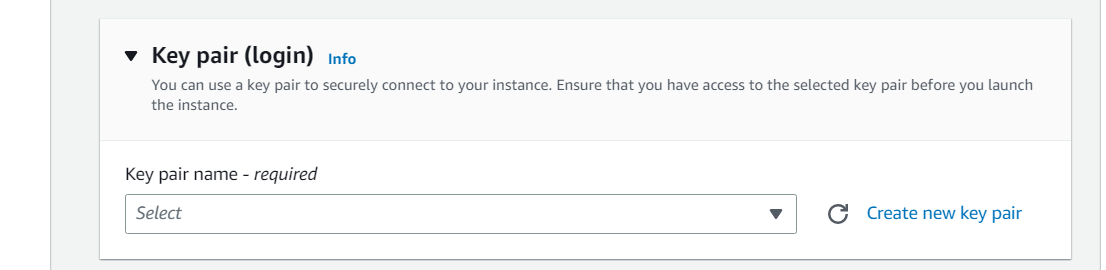
Give a name to your Key Pair. Select the key pair type according to your needs and select the private key file format as per your use.
The .pem file works for every Operating System and the .ppk file is only for Windows Operating System.
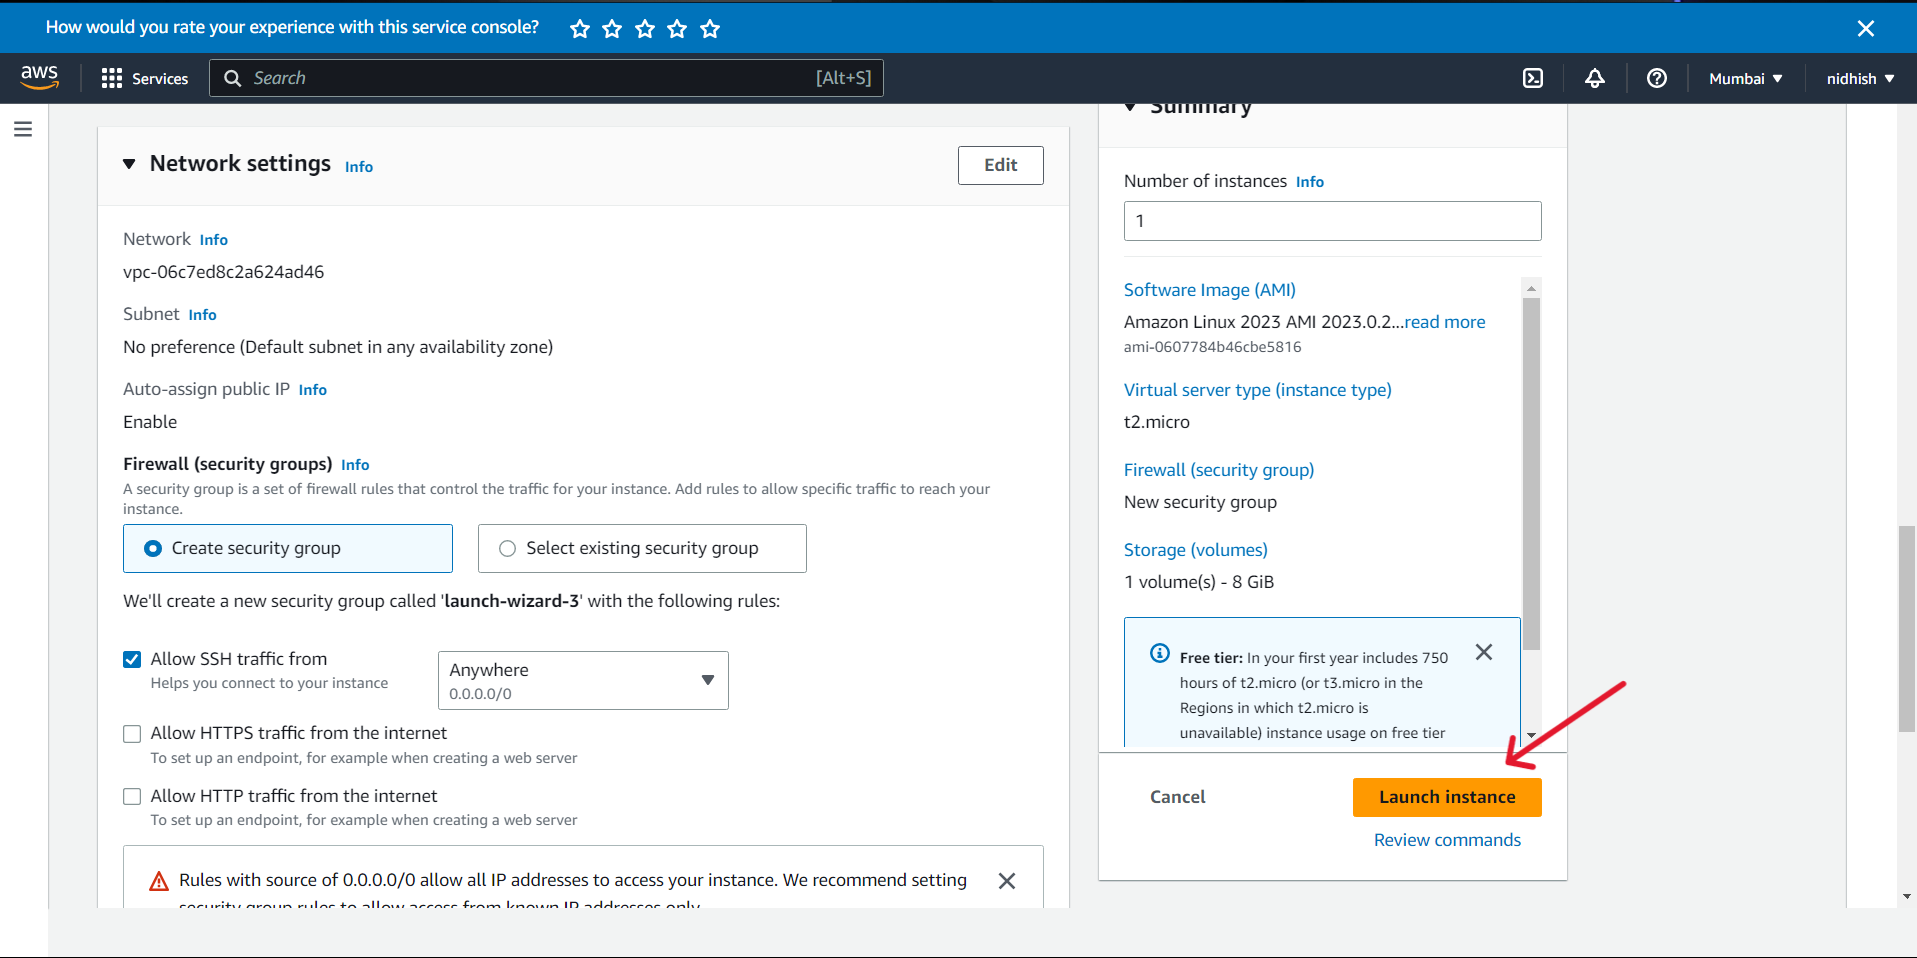
Select the Network Configuration according to your needs and Launch the Instance.
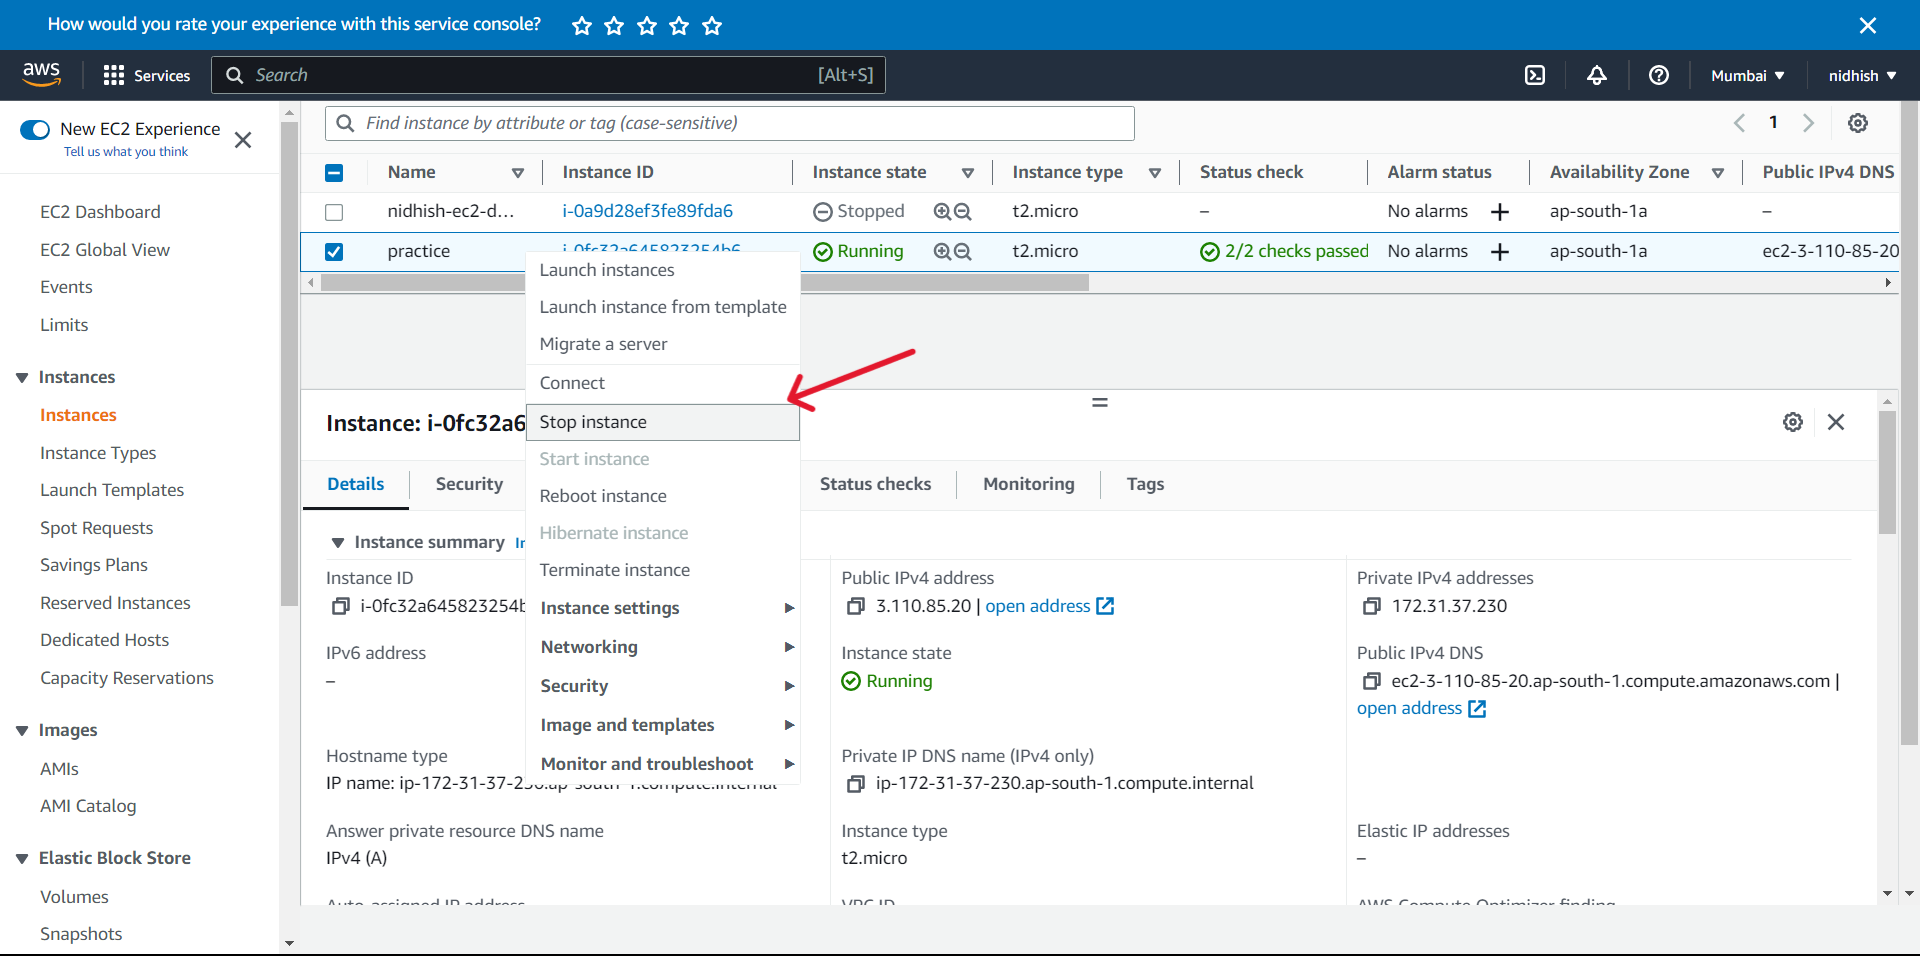
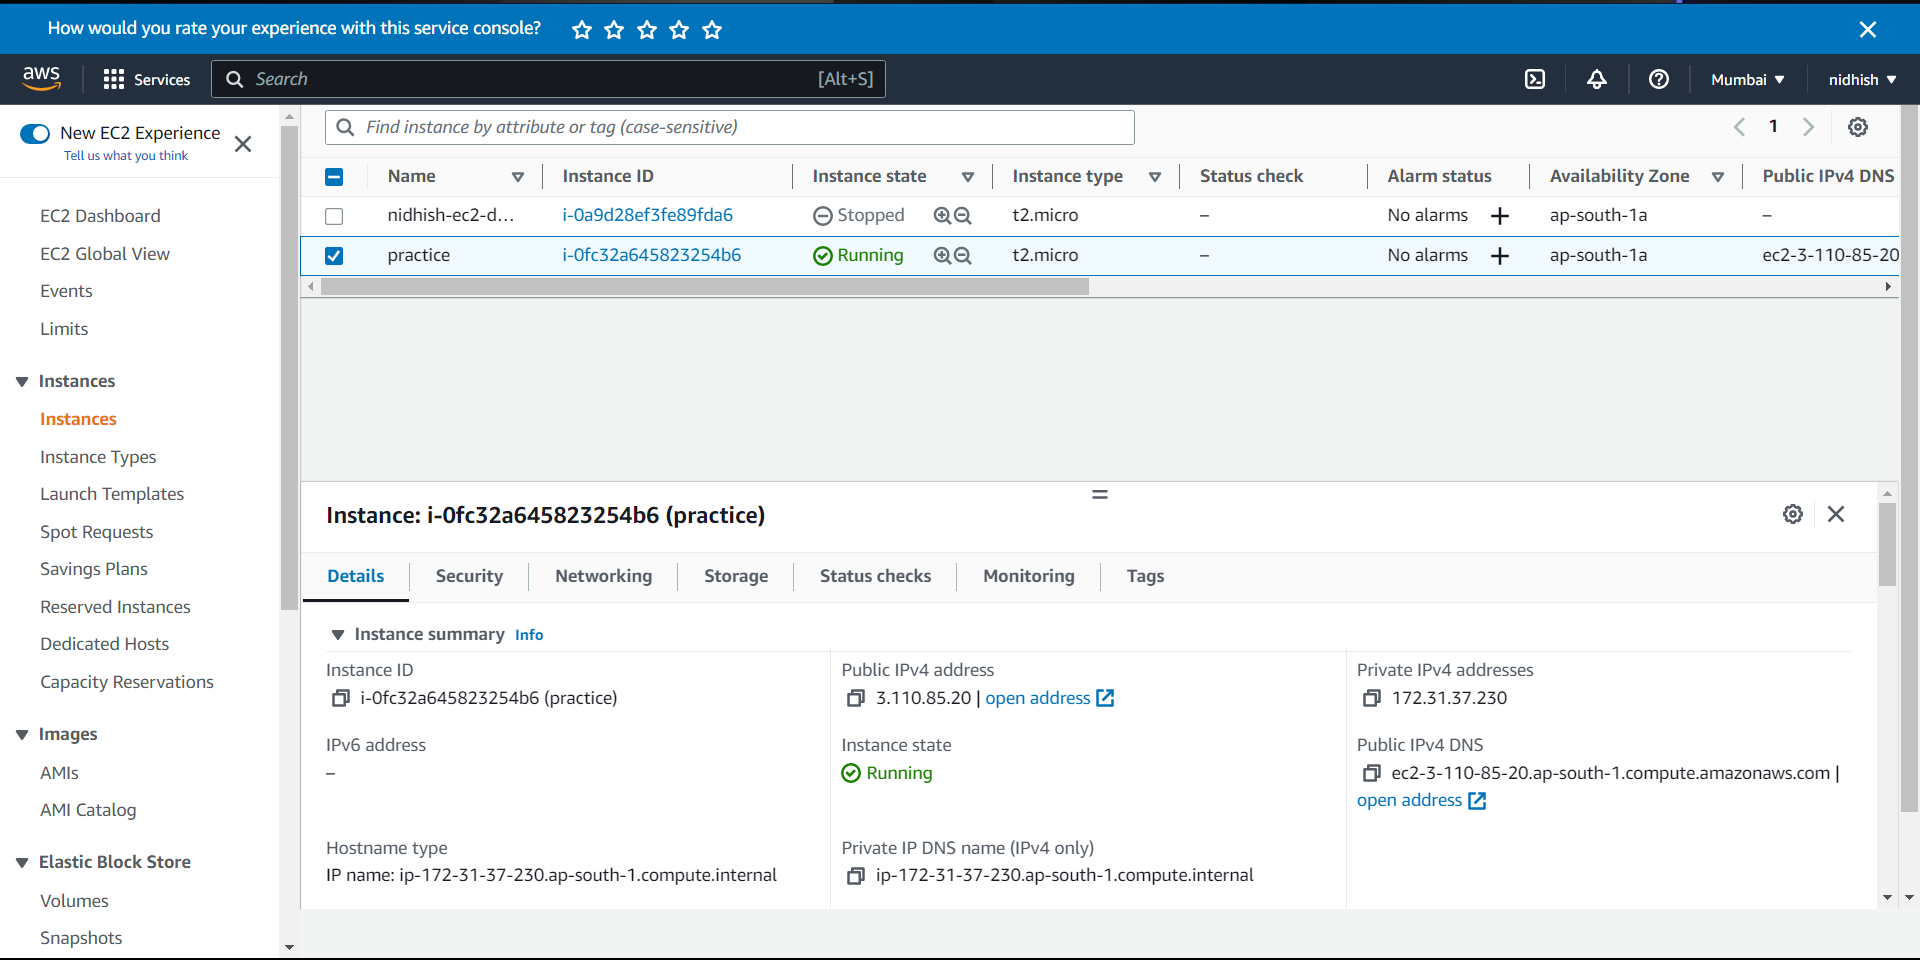
After Launch your Instance will be looking like this :
Accessing EC2 With Linux
Open Your CLI (Command Line Interface).
Copy your Key Pair file from Downloads and paste it into a new folder/directory.
You can create a new directory using (mkdir).
For copy and paste you can use ( cp Downloads/"key-pair name" "folder name where you want to paste/".) ex - cp Downloads/nidhish-ec2-demo.pem launch/
After this, you should switch to your directory where you have pasted the file using the cd command. (ex-cd launch)
Firstly provide the permissions to the file in Linux. Use chmod 400 "file-name". (ex- chmod 400 nidhish-ec2-demo.pem).To provide the permissions.
After all this use the ssh command for accessing your instance.
The proper command is ssh -i "key pair name" "username of instance"@"Public IPv4 address".
ex - ssh -i nidhish-ec2-demo.pem ubuntu@ 3.110.85.20
Here is the username of every OS Image.
For Amazon Linux 2 or the Amazon Linux AMI, the username is
ec2-user.
For a CentOS AMI, the user name iscentos.
For a Debian AMI, the user name isadmin.
For a Fedora AMI, the user name isec2-userorfedora.
For an RHEL AMI, the user name isec2-userorroot.
For a SUSE AMI, the user name isec2-userorroot.
For a Ubuntu AMI, the user name isubuntu.
For an Oracle AMI, the user name isec2-user.
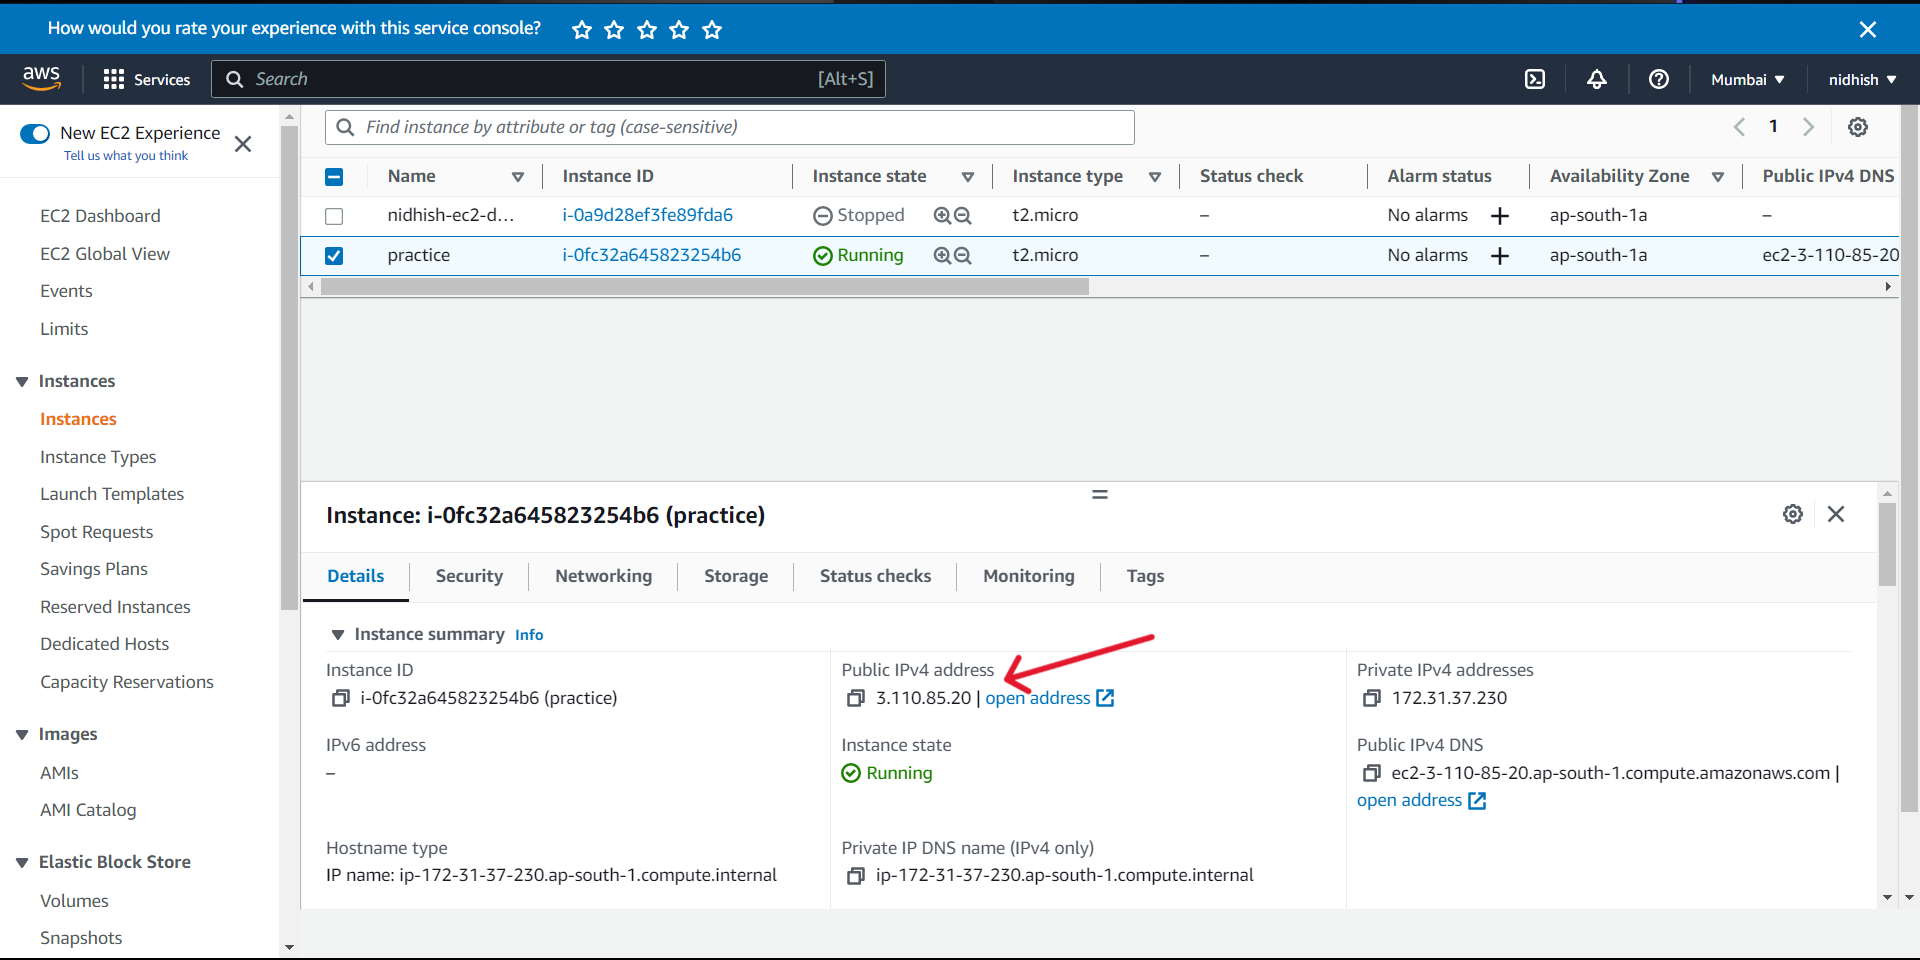
For a Bitnami AMI, the user name isbitnami.The below image depicts where you can get your public address.
Type exit to get out of your Instance.
Don't forget to STOP your EC2 Instance.